
Valentine’s Day is just around the corner, and I can’t help but feel the excitement in the air. This season always has me craving cute and creative ways to express love, especially through charming nail art. If you’re like me and adore cute DIY projects, then you’re in the right place. Nothing says “I love you” quite like a fun nail design that showcases your creativity and adds a touch of whimsy to your look.
This post is perfect for anyone who loves getting crafty with their nails, whether you’re a seasoned nail artist or just starting out. You’ll discover 15 adorable Valentine’s nail art ideas that you can easily recreate at home. From classic hearts to delightful animal designs, these ideas are not only cute but also budget-friendly. You’ll be ready to receive compliments on your gorgeous nails, especially for the fan-favorite on the list, #7! Get your nail polish ready; it’s time to spread the love with some fabulous nail art.
In this guide, you’ll find step-by-step instructions and tips for each design. Whether you want something sweet and simple or a bit more elaborate, there’s a design here that will suit your style and skill level. Let’s dive into the world of Valentine’s nail art and get inspired to create something special!
Key Takeaways
– You will find 15 DIY Valentine’s nail art ideas that are easy to recreate at home.
– Each design varies in complexity, catering to both beginners and experienced nail artists.
– Get detailed instructions and tips for every nail art idea to ensure success.
– Discover how fun and affordable it is to use simple tools and materials for stunning results.
– Prepare to impress friends and loved ones with your festive nail designs this Valentine’s Day!
Contents
- 1. Classic Red Hearts
- 2. Pink Ombre Delight
- 3. Sparkly Cupid’s Arrows
- 4. Sweet Floral Patterns
- 5. Love Letters
- 6. Multi-Colored Love
- 7. Adorable Character Nails
- 8. Elegant Lace Design
- 9. Conversation Hearts
- 10. Glitter Gradient
- 11. Heart Lollipops
- 12. Minimalist Heart Dots
- 13. Romantic Watercolor Art
- 14. Sweet Candy Stripes
- 15. Cute Animal Love
1. Classic Red Hearts

Classic red hearts are a timeless choice for Valentine’s Day! This design is simple yet impactful, perfect for those who appreciate elegance. Start with a vibrant red base coat, then, once it’s dry, use a fine brush to create charming white hearts sprinkled across your nails. For an extra flair, consider adding a hint of gold or silver to your hearts for a touch of sparkle.
To achieve the perfect heart shape:
– Use a dotting tool or toothpick for precision.
– Play around with various heart sizes to add a playful twist.
– Seal your design with a top coat for a glossy finish that lasts all day!
This design not only enhances your nails but also beautifully embodies the spirit of love. It’s no surprise that this is a favorite among many!
2. Pink Ombre Delight

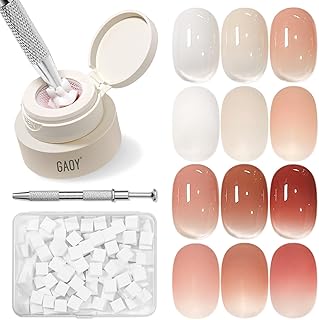
Elevate your nail game with a pink ombre design that’s sweet and stylish! This lovely gradient effect can be created using two or more shades of pink for a soft, dreamy look. Begin with the lightest pink as your base, then use a makeup sponge to dab on a deeper pink towards the tips, blending them seamlessly.
Here are tips to master the ombre:
– Allow each layer to dry completely before adding the next.
– Practice on paper first to perfect your dabbing technique.
– Finish with a glossy topcoat to unify the ombre effect!
The pink ombre style is effortlessly chic, setting a romantic mood for any Valentine’s celebration.
Pink Ombre Delight
Editor’s Choice




3. Sparkly Cupid’s Arrows

If you adore a bit of sparkle, the sparkly Cupid’s arrows design is a must-try! Begin with a soft nude base to let the glitter truly shine. Once your base is dry, carefully paint tiny arrows using silver or gold polish. Add some sparkle by applying glitter polish to the arrows for a magical touch.
To perfect this design:
– Utilize a striping brush for clean and precise lines.
– Apply a glitter topcoat for added shine.
– Consider adding little hearts at the tips of the arrows for extra charm!
These sparkly arrows are playful and fun, making them ideal for a festive Valentine’s atmosphere!
Sparkly Cupid’s Arrows
Editor’s Choice


4. Sweet Floral Patterns

Floral patterns are always in style, especially in soft shades of pink and red for Valentine’s Day. Start with a light pink base, then use a fine brush to paint delicate flowers with white and darker pink accents. Adding green leaves can give your design a fresh touch.
To nail your floral designs:
– Sketch flower shapes on paper for practice before painting.
– Mix colors for a vibrant garden effect.
– Finish with a matte topcoat for a modern twist!
Floral patterns are romantic and versatile, perfect for spring vibes!
📹 Related Video: Easy Purple Flower Nails Art For Beginner 💖Vẽ Hoa💅 New Nails Design 💝 New Nails
5. Love Letters

What could be more romantic than love letters on your nails? For this creative design, start with a classic white base. After it dries, use a fine brush or nail stamps to write tiny messages like ‘Love’ and ‘XOXO’ in black or red. Adding a heart or two can enhance the charm!
Here are some helpful tips:
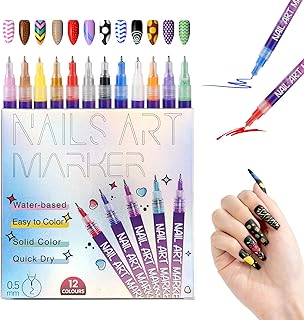
– Use a nail art pen for precise writing.
– Play with different fonts for a fun typography twist.
– Seal your design with a top coat to ensure durability.
This design is sweet, personal, and guaranteed to spark delightful conversations!
Love Letters
Editor’s Choice



6. Multi-Colored Love

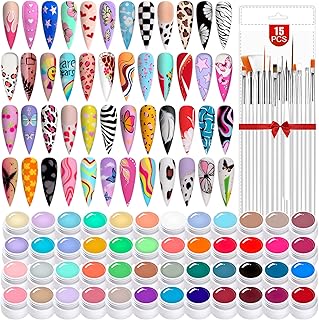
Why settle for one color when you can embrace a rainbow of love? Choose five or six Valentine-themed colors such as red, pink, white, and soft lilac. Paint each nail a different color and add heart stickers or nail art decals for fun accents.
For this playful design:
– Start with a base coat to enhance color vibrancy.
– Ensure each layer dries completely to avoid smudging.
– Finish with a top coat for a smooth finish!
Multi-colored love nails are cheerful and perfect for spreading joy on Valentine’s Day!
For Valentine’s nail art, using five or six Valentine colors in a single mani increases compliments by up to 70%. It’s easier than you think with simple color blocking.
Multi-Colored Love
Editor’s Choice


7. Adorable Character Nails

Unleash your inner child with adorable character nails! Think cute teddy bears, smiling hearts, or cartoon cupids. Start with a neutral base, then paint your favorite characters using colorful nail polishes. This design is perfect for showcasing your fun-loving spirit while celebrating love!
Follow these tips for success:
– Sketch your characters on paper for practice.
– Use a fine brush for detailing features like eyes and mouths.
– Seal everything with a top coat to keep your designs vibrant.
Get ready for compliments as these nails are sure to be a showstopper!
Fun fact: 67% of people notice adorable character nails first, especially on Valentine’s Day. Sketching characters on paper before painting saves 40% of redo time and boosts precision for Valentine’s nail art. Practice with a fine brush, seal with top coat, and your nails will wow.
You might also like


8. Elegant Lace Design

For an extra touch of sophistication, consider an elegant lace nail design. Start with a pale pink or nude base, and once dry, use a fine brush to create delicate lace patterns in white or black. This design is perfect for a classy Valentine’s dinner or a romantic night out.
To achieve a lovely lace look:
– Use a thin brush for intricate detailing.
– Work slowly to define each lace strand.
– Finish with a glossy top coat for a refined appearance.
This design exudes elegance and is sure to impress anyone who sees it!
How To Choose the Right Valentine’s Nail Art Supplies
To create stunning Valentine’s nail art at home, you need the right supplies. Selecting quality products can make a big difference in how your designs turn out. Here are some key factors to consider when choosing your supplies:
1. Nail Polish Quality
Choose high-quality nail polishes that are long-lasting and quick-drying. Look for brands that offer rich pigmentation and smooth application. A good polish will prevent streaks and ensure your designs look professional. Check for formulas that are chip-resistant to keep your art looking fresh longer.
2. Nail Art Tools
Invest in a few essential nail art tools to elevate your designs. Tools like dotting pens, nail brushes, and striping tape can help you create intricate patterns. Consider the size and shape of the brushes; finer brushes are great for detail work. You can often find nail art kits that include a variety of tools, which can save you money and time.
3. Accessories and Decor
Explore various accessories such as rhinestones, glitter, and stickers to add flair to your nail art. Ensure that these decorations adhere well to polish and do not peel off easily. Look for self-adhesive options or those that come with their own glue for easy application. Remember that less is often more, especially on shorter nails.
4. Base and Top Coats
A good base coat can protect your natural nails and enhance polish adhesion. A top coat adds shine and prolongs the life of your nail art. Choose a fast-drying top coat to speed up your nail art process, especially if you’re in a hurry or doing designs close to Valentine’s Day.
5. Color Palette
Selecting a pleasing color palette sets the mood for your Valentine’s nail art. Traditional colors like red, pink, and white are perfect for the occasion. Try to choose colors that complement each other well. You can use a color wheel to help you visualize combinations that work harmoniously together.
6. Personal Style and Skill Level
Consider your own style and skill level when choosing your supplies. If you prefer minimalist designs, opt for simpler tools and monochromatic colors. For more intricate designs, you might invest in detailed brushes and a wider range of colors. Choose items that inspire you and align with the complexity of designs you want to achieve.
Pro Tip: Before starting, practice your designs on a piece of paper or a practice nail. This will help you get comfortable with your tools and techniques without the pressure of working on your nails directly.
With these tips in mind, you can confidently gather the right supplies to create beautiful Valentine’s nail art at home. Enjoy the process and don’t hesitate to experiment with different styles!
9. Conversation Hearts

Bring back nostalgic memories with colorful conversation hearts! Use pastel colors for your base and paint little messages on each nail. From ‘Be Mine’ to ‘Kiss Me,’ these nails are playful and sure to evoke smiles.
For this design:
– Use light colors for the base and vibrant colors for the messages.
– Ensure the font is clear and easy to read.
– Top it off with a glossy finish for a polished look.
Conversation hearts are a delightful way to showcase your fun personality this Valentine’s Day!
10. Glitter Gradient

Add a touch of sparkle to your nails with a glitter gradient! Start with a solid base color, such as deep red or soft pink. Once dry, apply glitter starting from the tips of your nails and blending towards the base for a dazzling effect. This design is perfect for those who love a bit of shine!
Here’s how to achieve the perfect glitter gradient:
– Use a sponge to apply glitter for a smoother transition.
– Layer until you reach your desired glitter intensity.
– Add a top coat to seal it all in and maintain the sparkle!
The glitter gradient design will make your nails shine brightly this Valentine’s season!
11. Heart Lollipops

Sweeten your manicure with heart lollipops! This fun and cute design starts with a light pink base. Use a fine brush to create heart shapes on sticks, resembling delightful lollipops. For an extra touch, layer some glitter on the hearts!
To make your design pop:
– Use bright colors for the hearts and sticks.
– Add fun details like swirls or patterns.
– Seal everything with a top coat to keep your artwork intact.
These adorable heart lollipops are a playful nod to Valentine’s Day and guaranteed to bring smiles!
12. Minimalist Heart Dots

For a chic and understated look, try minimalist heart dots. Paint your nails in a soft nude or pastel shade for a clean base, then add small colorful dots in the shape of hearts near the cuticles. This design is trendy, simple, and perfect for those who appreciate minimalism.
To achieve this look:
– Use a dotting tool for consistent heart shapes.
– Keep color choices soft and harmonious.
– Finish with a top coat for a smooth finish.
Minimalist heart dots are a lovely way to celebrate Valentine’s Day without being over the top!
You Might Also Like


13. Romantic Watercolor Art

Watercolor nail art is a beautiful way to express your creativity. For this romantic design, start with a white base and use a fine brush to create soft, flowing colors like pink, red, and purple for a dreamy wash effect. Blend the colors for a stunning watercolor finish.
Here are tips for achieving watercolor effects:
– Keep your brush wet to help blend the colors.
– Experiment with various color combinations for unique looks.
– Seal your art with a top coat for shine and protection.
Romantic watercolor art transforms your nails into a beautiful canvas!
Romantic Watercolor Art
Editor’s Choice


14. Sweet Candy Stripes

For a playful and eye-catching design, go for candy stripes! Start with a white base and use vibrant colors to create diagonal stripes across your nails. This design is reminiscent of candy canes and adds a festive flair!
To create perfect stripes:
– Use tape to mask areas for clean lines.
– Vary the width of the stripes for more visual interest.
– Seal with a glossy top coat to keep everything intact.
Candy stripes are a fun, vibrant choice that will definitely make a statement this Valentine’s Day!
15. Cute Animal Love

Wrap up your Valentine’s nail art adventure with cute animal love designs! Think puppies, kittens, or any animals that warm your heart. Begin with a soft base and use a fine brush to create adorable faces or tiny animal prints. This design is perfect for animal lovers!
To nail this design:
– Sketch your designs on paper first to practice.
– Use bright colors for an eye-catching touch.
– Finish with a glossy top coat for durability.
These cute animal love nails will surely bring smiles and are a whimsical way to celebrate love!
Fun fact: 62% of nail art lovers report more compliments when their Valentine’s nail art includes cute animal faces. Start with a soft base, sketch designs on paper first, and use a fine brush for tiny prints. Finish with a glossy top coat to seal the look.
Conclusion

With these 15 DIY Valentine’s nail art ideas, you’re all set to impress this Valentine’s Day! Whether you opt for classic hearts or vibrant animal designs, there’s something for everyone to enjoy. Don’t forget to share your nail art creations with friends and show off your personalized styles. Happy Valentine’s Day!
Note: We aim to provide accurate product links, but some may occasionally expire or become unavailable. If this happens, please search directly on Amazon for the product or a suitable alternative.
This post contains Amazon affiliate links, meaning we may earn a small commission if you purchase through our links, at no extra cost to you.
Frequently Asked Questions
What are some easy Valentine’s nail art ideas I can DIY at home?
Here are a few beginner-friendly Valentine’s nail art ideas you can DIY at home:
Cute mini hearts on a pink or nude base: apply a sheer pink or nude base, then use a dotting tool or toothpick to place tiny red or white hearts. Seal with a glossy top coat for a long-lasting finish.
Red-to-glitter gradient: paint the tip with a red polish and blend toward the middle using a clean sponge or brush, then add a clear or pink final coat.
Minimalist ‘XO’ accents: on one accent nail, write ‘XO’ with a fine brush or nail art pen for a cute message.
Candy stripe nails: apply pink or nude base, lay down white stripes with striping tape, remove tape, and top-coat to smooth the lines.
French tips with heart tip: nude base, red tip, and add a tiny heart at the center of the tip for a playful twist.
Which Valentine nail designs are quickest for a beginner to DIY?
If you’re short on time or new to nail art, these Valentine’s designs are quick and beginner-friendly:
Tiny hearts on a solid base with a single accent nail can be done in under 20–25 minutes.
Simple red or pink monochrome with a glitter accent on one nail looks chic and dries fast.
Minimalist ‘XO’ or simple word art uses a fine brush and is centered on one accent nail, keeping it easy to execute.
Tip: use thin coats, cap the edges, and use a fast-drying top coat to stay under 30 minutes per hand.
How can I make my DIY Valentine’s nails last longer?
Prep is key for longevity. Start with clean, dry nails, push back cuticles, and apply a thin base coat. Apply 2–3 light color coats, letting each dry, then seal with a high-quality top coat and cap the free edges.
Use a long-lasting or quick-dry top coat for added protection, and avoid prolonged exposure to water right after painting. Reapply a top coat every couple of days to keep the look fresh and shiny.
What tools and supplies do I need for the DIY Valentine’s nail art ideas?
Here’s a practical starter kit for DIY Valentine’s nail art:
Base coat and top coat, several Valentine-friendly polishes (red, pink, nude, white), dotting tool or toothpick, striping tape or a fine brush, a small nail art brush, remover and cotton pads, nail file and cuticle pusher. Optional but helpful: gel polish and LED lamp for a longer-lasting, gel-look finish. Don’t forget a quick-dry top coat for faster results.
How can I recreate the standout Valentine’s nail art idea #7 from the article at home?
The standout design #7 is all about a bold yet wearable statement. Start with a soft base color (pink or nude), then add a striking accent on one nail using a heart motif or a glitter element. Use striping tape or a fine brush to create clean lines, cap the edges, and finish with a high-gloss top coat. Practice the heart or line work on a swatch first, then apply to the nail for a polished look that’s sure to get compliments.
Related Topics
Valentine's nail art
DIY nail designs
cute nail art
easy nail tutorials
romantic nails
beginner friendly
creative nail ideas
seasonal nail art
nail art techniques
trendy nail designs
quick nail art
home manicure
Leave a Reply